DIY family ornaments. Possibly one of the best holiday traditions ever? Okay maybe a bit over the top. But ask us again in 20 years.
The best part about these DIY cuties. They’re SO easy to create.
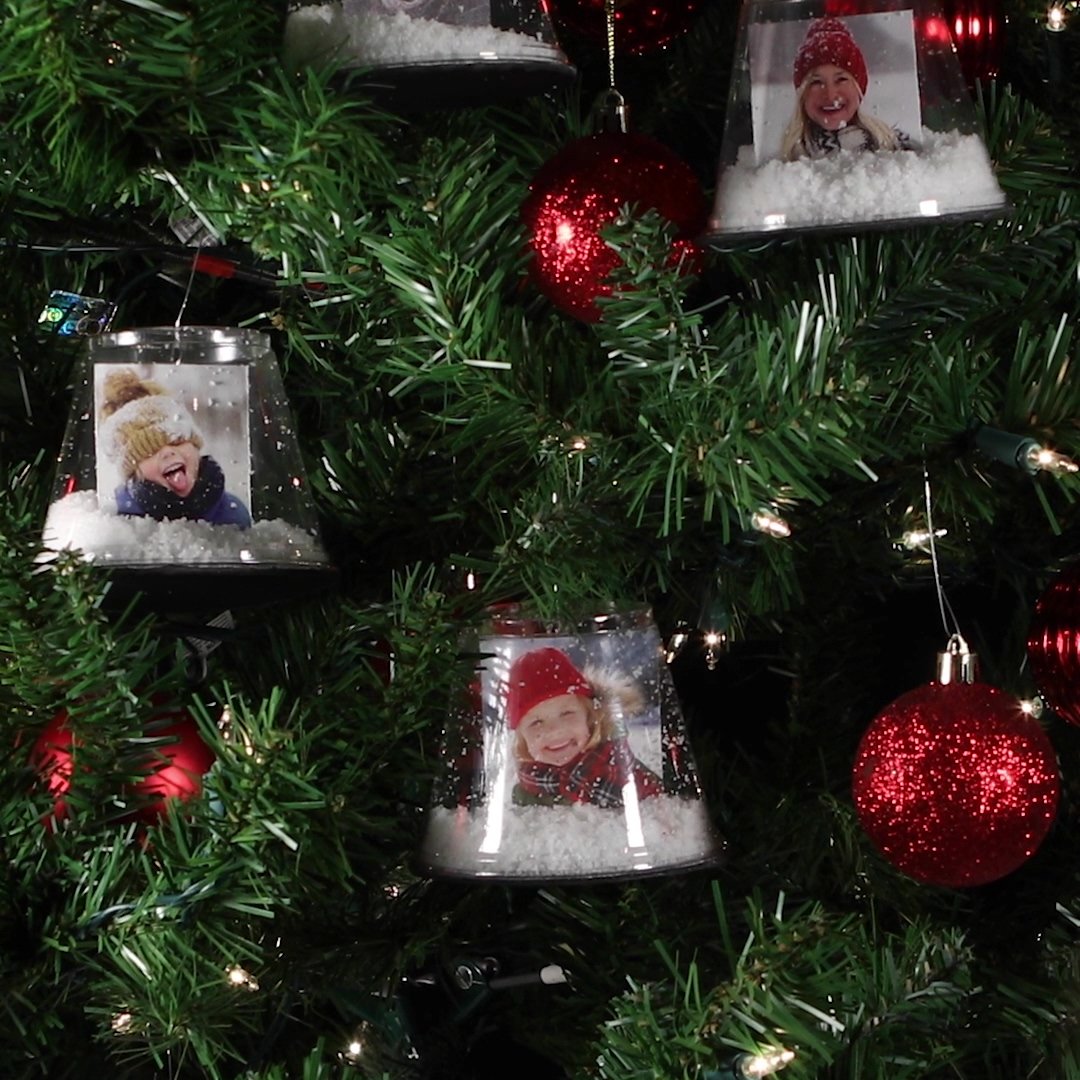
How to make diy family ornaments
The list:
- 1 package 9 oz. Solo Clear Cup
- 1 pack each of red and green craft paper
- 1 photo of each family member you don’t mind cutting up
- Twine
- Glue
- Scissors
- Permanent Marker
Cut each family members head out of their photo. Next use the top of your clear cup to trace a perfect circle on your red or green paper.
Cut that circle out and glue you family member’s photo upright to the middle of it. Next, delicately lay your cotton balls and other decorations around the circle. Be careful to leave enough room at the edges to run a strip of glue around the whole thing.
Once you’re done decorating, make a circle of glue around your piece of paper. Turn your clear cup over and place on top.
Using your scissors, punch two holes in the bottom of the clear cup (which is now the top of your ornament. Tie your twine and it’s ready for display.
Repeat the process for any other family member, friend, loved one, etc. Happy Holidays!